Alright, I am Faizan Ali, your friendly neighborhood digital creator and tech enthusiast. Gosh, I gotta tell ya, after years of wrestling with Windows, there’s just nothing that quite gets under my skin like when a PC starts acting all wonky post-uninstall. Seriously, it’s like your machine suddenly decides it’s too cool for school, refusing to cooperate. Or maybe, you know, it’s just throwing a full-blown toddler tantrum right there on your desk. Makes you wanna pull your hair out sometimes, doesn’t it?
I have also felt the same – error messages kept on coming and I kept thinking about what went wrong. Once, I uninstalled a stubborn software and after that, my Windows 11 had become so slow that some apps were even refusing to open. Honestly, my PC often feels like it’s stuck in digital quicksand after a bad uninstall. Boom! Corrupted registry, I always figure.
But seriously, don’t sweat it, friend. You’re not alone, and this ain’t as big as it seems. We’ll fix it. This guide? It’ll help you untangle those irritating Windows 11 registry headaches, the ones that stick around. Let’s do this! 🚀
What Exactly is Your Windows 11 Registry?
Imagine your Windows 11 computer is like a well-organized city. Each building, each road, and each traffic light have its specific rules about how to operate. Similarly, the Windows Registry is a central blueprint and rulebook that controls the entire system. It is a large database where all low-level settings, configurations, options, software, hardware, and even your personal preferences are stored. Simply put, the registry is the brain of your PC.
Every time you install a new program, change a setting, or connect a new device, its record is created in the registry. It is constantly updated, and the system repeatedly refers to it. If the registry is healthy, the system will run smoothly, apps will launch properly, and hardware will communicate perfectly.
Why Do Registry Issues Occur?
The problem arises when you uninstall software. Ideally, the uninstaller should remove all files and registry entries as well. One is needed, but sometimes uninstallers are a bit lazy and don’t do a complete cleanup. Result? There are “orphaned” or “broken” entries left in the registry – data that points to programs that no longer exist.
At first, this may seem like a small matter, but over time this clutter begins to grow. Then comes system instability, performance issues, and unnecessary headaches. This is where you may need Windows 11 registry repair.
Signs of a Corrupted Windows 11 Registry
How do you know your Windows 11 registry’s acting up? Simple: your PC usually isn’t quiet about it; it screams symptoms. If you’ve just tossed some software, and these things now pop up, a registry check-up is probably due:
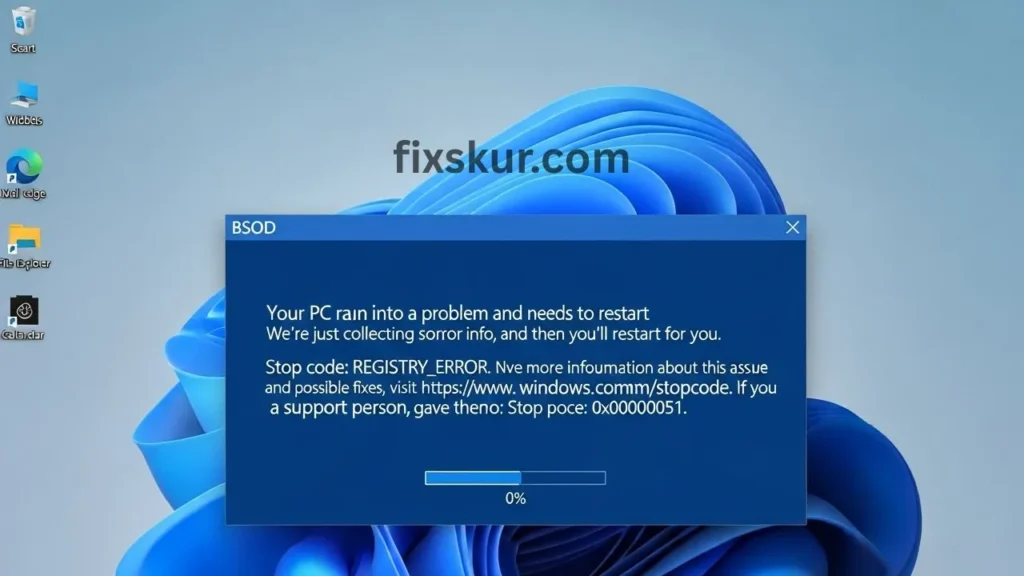
- Frequent Crashes or Freezing: The machine randomly locks, or that scary Blue Screen of Death (BSOD) appears. Sometimes, BSOD directly reveals messages such as “STATUS_CANNOT_LOAD_REGISTRY_FILE” or “FATAL_UNHANDLED_HARD_ERROR”.
- Slow Performance: Windows 11 appears slow, takes time to boot, or programs forever to launch. This is mostly due to the accumulation of unwanted, empty, or corrupt entries in the registry.
- Weird Error Messages: Random pop-ups keep appearing that don’t make any sense, especially when you try to open specific apps.
- Software Glitches: Even your other installed programs might act bonkers—refusing to launch, just plain not working, or crashing right when you need ’em.
- Install/Uninstall Problems: New programs? They might just flat-out refuse to install. Or those old apps you tried to ditch? They keep popping up everywhere, like that stubborn guest who just won’t leave.
- Hardware Issues: Occasionally, hardware will also throw a tantrum if the entries related to its drivers in the registry have been damaged.
Before We Start: Essential Safety Measures (Don’t Skip This!)
First and foremost, an important thing to note: messing with the registry without taking precautions is as risky and painful as undergoing a surgery without anesthesia! 😅 Therefore, it’s necessary to prepare our safety net before we undertake the task of repairing the Windows 11 registry.
Step 1: Create a System Restore Point
The very first step is to create a Restore Point. Essentially, this is a snapshot of your system at a certain point in time, which saves the registry and system settings. If something goes wrong during the repair process, you can easily return your system to this stable state. Don’t worry, it won’t touch your personal files; only undo system changes that occurred after the restore point was created.
Here’s the process:
- Press Win + R, the Run dialog box will open.
- Type ‘rstrui’ and press Enter.
- In the System Restore window, click on ‘Create a restore point’.
- If System Protection is disabled, click on ‘Configure’, select ‘Turn on system protection’ and adjust the disk space. Then press Ok.
- Click on ‘Create…’. Give your restore point a clear name (like Before Registry Repair – [Date]).
- Hit Create and just let it finish up.
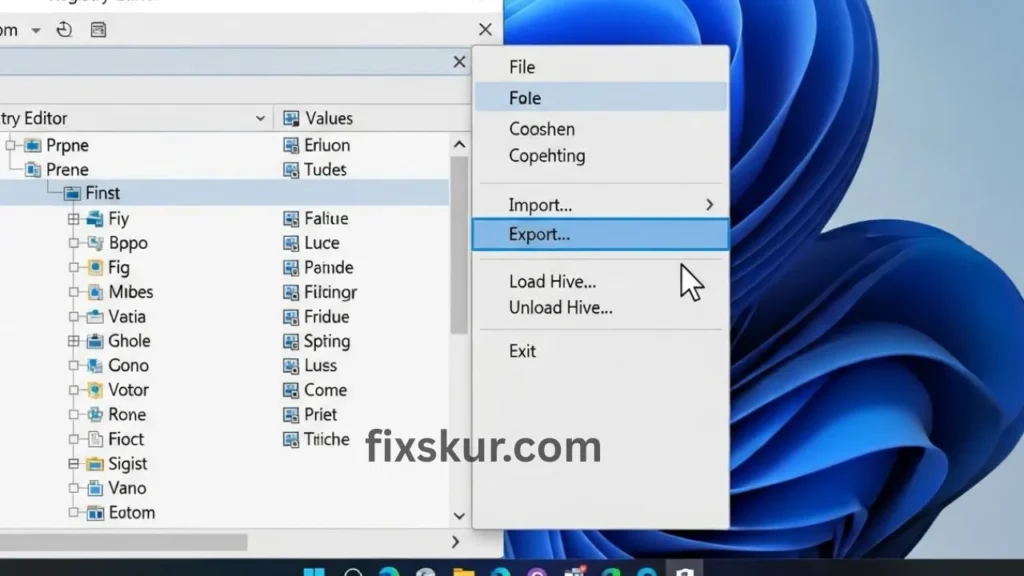
Step 2: Back Up the Registry
Next, you’ll wanna back up your Registry – consider it your ultimate safety net. Seriously, if you ever gotta dive deep, this backup is a lifesaver, trust me.
Here’s the drill, it’s super easy:
- Just press Win + R, type regedit, and hit Enter (say “Yes” if UAC pops up).
- Inside the Registry Editor, click File, then Export.
- For “Export range,” pick “All” – that grabs the whole shebang.
- Stash it somewhere safe (like an external drive or cloud), giving it a name you’ll remember, like RegistryBackup_[Date].reg.
- Then, just hit Save.
Boom! Done. With these two safety nets, you will feel more confident, and if something does go wrong, the backup is ready. 🚀
Step-by-Step Solutions to Repair Corrupted Windows 11 Registry
Let’s roll up our sleeves now and directly tackle those corrupted registry entries. First, we will use Windows’ built-in safe tools, then move to more comprehensive solutions.
Method 1: System File Checker (SFC /scannow)
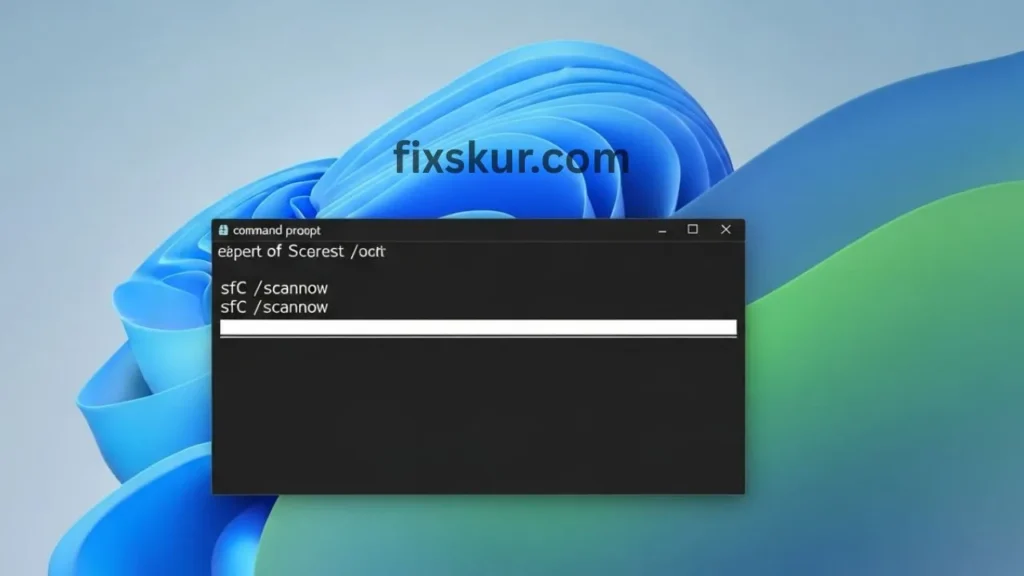
The first option is Windows’ built-in tools. Windows 11 has some powerful command-line utilities designed to keep the system healthy. These tools fix system file corruption and image issues, which are a common cause of registry problems.
This is a lifesaver tool. It scans your system for corrupted or missing files and tries to replace them with healthy cached copies. Many times registry problems are due to this reason.
How to run SFC process:
- Press Win + X and select “Terminal (Admin)”, or search for “Command Prompt”, right-click, and select “Run as administrator”.
- Type: sfc /scannow and press Enter.
- Wait for the scan to complete (30 minThen these messages might be received:
- “Windows Resource Protection did not find any integrity violations.” (It means everything is fine 👍)
- “Windows Resource Protection found corrupt files and successfully repaired them.” (Even better 👌)
- “Windows Resource Protection found corrupt files but was unable to fix some of them.” (Do not worry, now it is the turn of DISM).
- Restarting the PC after scanning is the best option.
Method 2: DISM (Deployment Image Servicing and Management)
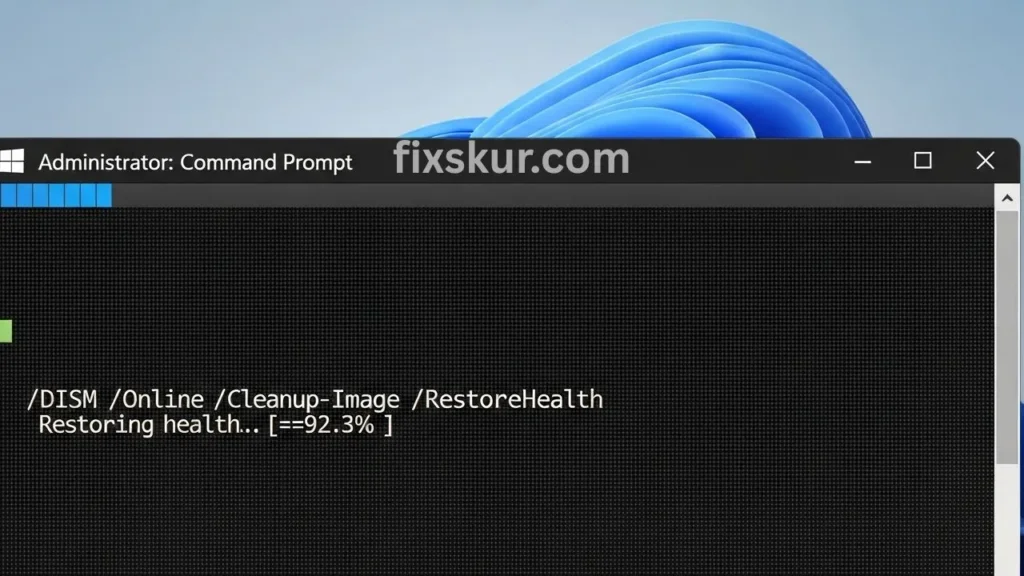
If SFC can’t fix everything, then use DISM. It repairs the Windows image, which serves as the base for SFC repairs. Essentially, it fetches fresh healthy files from Microsoft servers and repairs your local image.
Here is the process to run DISM:
- Open “Terminal (Admin)” or “Command Prompt (Admin)”.
- To perform a health check (optional):
- DISM /Online /Cleanup-Image /CheckHealth
- DISM /Online /Cleanup-Image /ScanHealth
- To repair:
- DISM /Online /Cleanup-Image /RestoreHealth
- Pro tip: The internet connection should be active. This may take 15-20 minutes, sometimes it may seem like it’s stuck (e.g., at 62.3%). Just keep patience, the process is ongoing.
- After it is done, run sfc /scannow again to confirm that everything has been restored.
- Then, restart the PC.
Method 3: System Restore
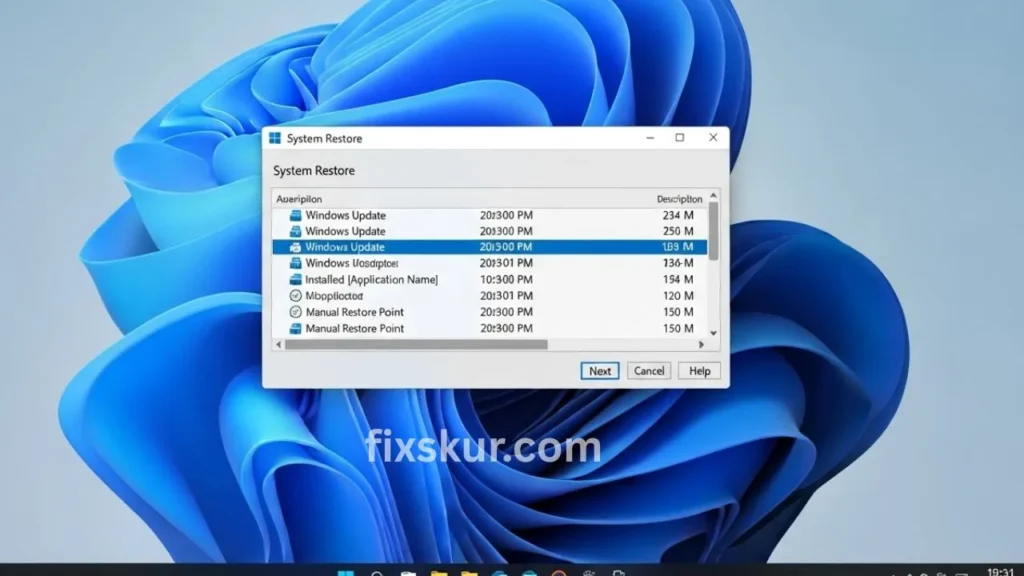
If the problem is not solved yet, or you believe the issues started after installing/uninstalling a specific software, then System Restore is the best option. This brings your system back to the time when everything was working fine.
The process to initiate System Restore:
- Press Win + R, type rstrui, and press Enter.
- Click on “Next.”
- A list of restore points will appear. Choose the one that was created before the issue started.
- Tip: You can click “Scan for affected programs” to see which programs will be removed after the restoration.
- After selecting a restore point, press “Next.”
- Confirm by pressing “Finish.” Your PC will restart and the restoration process will begin. Do not interrupt it.
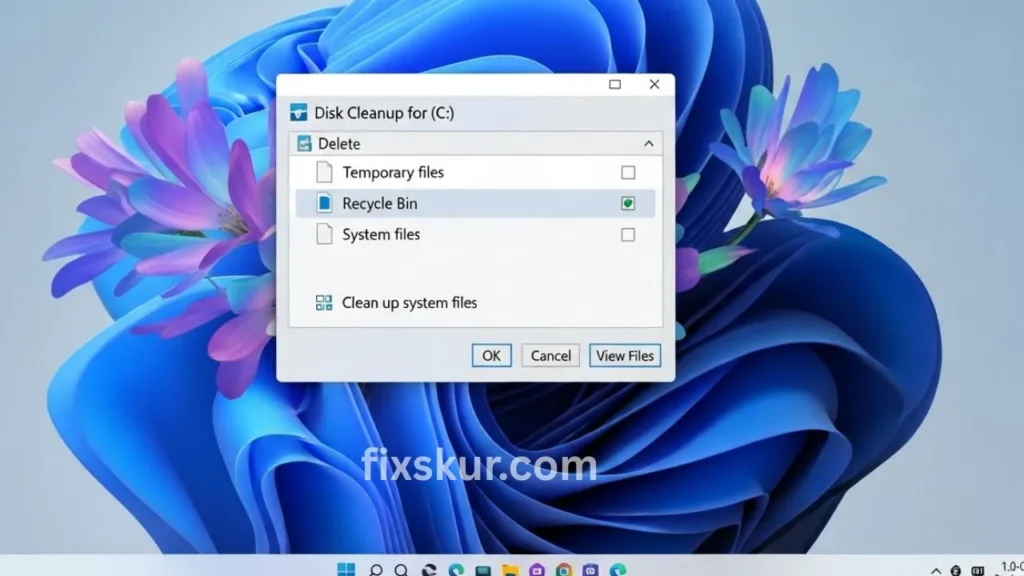
Method 4: Disk Cleanup
Sometimes, extra junk files and temporary data also increase registry issues. Disk Cleanup does not directly fix the registry, but indirectly helps by removing clutter.
The process to use Disk Cleanup:
- Search for “Disk Cleanup” in the Start menu and open it.
- Select your main drive (usually C:) and press “OK”.
- Click on “Clean up system files” (admin rights required).
- Select the drive again if prompted.
- Tick the file types you want to delete (like Temporary files, Recycle Bin, etc).
- Press “OK” and confirm.
Method 5: Manual Registry Editing (Use with Caution)
This part is a bit serious, my friend. Manually editing the registry (via regedit) is just like doing brain surgery without a medical degree 😅. A small mistake, a wrongly deleted key could make the system fail to boot or could permanently damage it.
My honest advice for beginners: avoid manual registry editing unless you have very clear instructions from a trusted source (like Microsoft Support), and you understand 100% of what you are doing. If you don’t have the experience, then the risk is much greater than the benefits.
However, should you have to do it, ensure you make a full backup of the registry first (as I explained before). Some advanced users delete residual keys of uninstalled software, but due to the tangled nature of the registry, this is quite risky.
Method 6: Reset or Clean Reinstall
And if all else fails, you have the nuclear option – Reset or Clean Reinstall.
To reset, go to: Settings > System > Recovery > Reset this PC. You have two options. There are two types – Keep my files (apps and settings will be deleted but personal data will be safe) or Remove everything (completely wipe).
Clean Installation: In this, we need to make a bootable USB with Windows 11 installation media and have to install the whole Windows again. This will completely wipe out your drive, so you should initially back up your important data on an external drive or cloud.
A Personal Experience with Registry Issues
Let me share a personal experience. Once I downloaded a “free” video converter (I know it was a mistake 😬). It got installed, but when I tried to uninstall it, it didn’t get removed from the control panel. I manually deleted the program files, and then the PC started behaving weirdly. Right-clicking on the desktop was showing a weird error and some video editing apps weren’t running. Clearly, ghosts had lodged in the registry.
I initially ran an SFC scan, which fixed some minor issues, but the main problem persisted. Then, I ran DISM RestoreHealth. The progress bar got stuck at 62.3%, I felt like… The system has frozen. I was a bit frustrated, but I quit and went to get some coffee. When I returned, the process was complete! After a reboot, the errors disappeared and the software was back to normal. Phew, what a relief! Seriously, that really hammered home a lesson: patience and just tackling things step-by-step? Absolutely essential.
Conclusion
At the end of the day, a corrupted registry is… Handling the ‘Y’ handle may seem scary at first, but you have both tools and knowledge. Just follow these steps: first the SFC and DISM, then System Restore, and follow prevention habits. A failed uninstall will not slow down your speed. Show some love and care to your Windows 11, and it will smoothly run with you for years.
And if you ever feel overwhelmed, just take a deep breath, read the steps again, and get help if needed. Happy computing!
Check out my other blog posts for more easy tips:
- How to Fix Phantom Clicks & Erratic Mouse Behavior on Windows & macOS
- Linux Window Management Hotkeys: Master Your Desktop!
- Find Lost Files: Advanced Google Drive & OneDrive Search