Alright, let’s be honest — how often have you sat in front of your computer, ready to begin working, and spent the first five minutes just….repeatedly clicking?
You open your browser by clicking. Then, you open three different folders to find that one project file. You open Spotify with a click. You open Notepad by clicking. Before even starting work, there’s a mini marathon with the mouse. That was my life, and honestly, it was driving me crazy.
My Journey to Faster Workflows
My name is Faizan, and I spend my days on my PC creating stuff. I remember one particular situation — I was editing a video. On one side was the video editor, one folder had raw footage, another had audio tracks, and a script was in a text file. Every time I had to switch between them, it felt like an awkward and irritating dance on the desktop.
There was a point when I literally took a deep breath and thought, “Man, there must be a faster way.”
And you know what? There is. And it’s been right in front of us all this time.
The Power of Custom Keyboard Shortcuts
I’m talking about ….This is about how to create custom keyboard shortcuts in Windows 11. And before you start thinking, “Oh, this seems complicated, this seems techy”- just wait. Trust me, it’s quite simple. It’s one of those tiny things that give you the feel of your computer working for you. To me, it felt like unlocking a secret superpower.
So, let’s go, I’ll show you step-by-step. No confusing tech jargon, just a simple friendly guide, which will make you wonder why you’ve tolerated so many clicks until now.
Why Bother Creating Custom Keyboard Shortcuts?
Before we delve into the “how”, we should briefly understand the “why”. You must be wondering, “Is this effort worth it?” Absolutely! Consider this: which apps do you use every day? It could be your web browser, some design software, or your favorite to-do list app. Now imagine, all of these launching instantly without lifting a hand from your keyboard.
Benefits of Keyboard Shortcuts
The benefits are quite tangible:
- Speed and efficiency increase: This is the biggest benefit. Using keyboard shortcuts reduces the time it takes to do things with a mouse to a fraction. The seconds saved add up, giving you more time to focus on your important tasks.
- Less reliance on the mouse: Continually lifting the mouse can slow you down and can sometimes cause strain in your hand. Keeping your hands on the keyboard makes the workflow smooth and comfortable.
- Improved focus: Since you don’t need to search through menus, you can maintain your concentration more easily. You can continue to work in your creative zone.
Getting Started: The Easiest Way to Create Custom Keyboard Shortcuts in Windows 11
So, how do we do this? The biggest thing – you don’t need to download any shady software or need a computer science degree for this. The easiest and the fastest method uses the old desktop shortcuts that you already know.
Truly, within the next 2 minutes, your first custom shortcut will be ready. Let’s do it together.
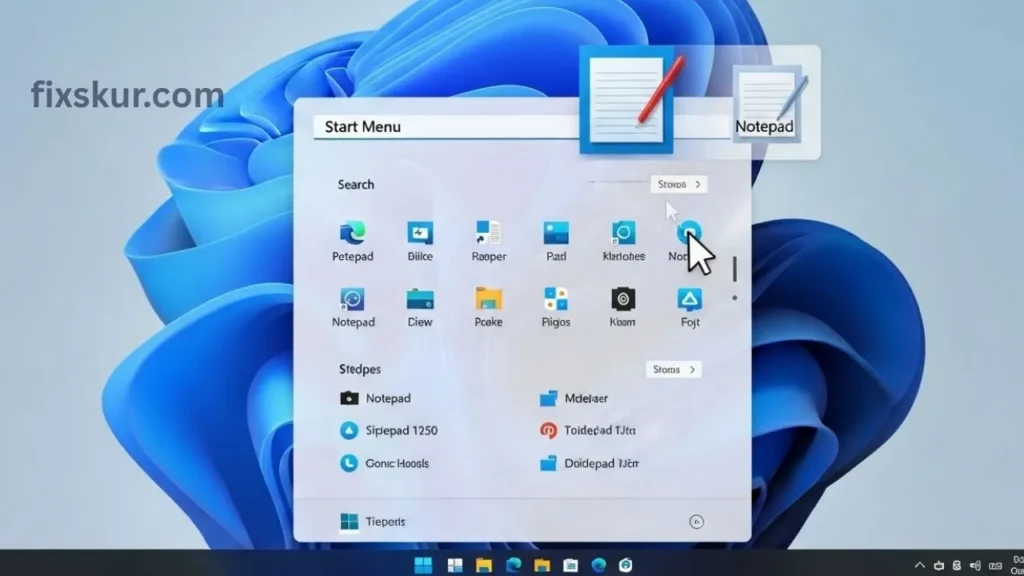
Step 1: Bring the Shortcut to the Desktop
The main trick is to have a shortcut file. So first, let’s create a shortcut for the app or folder that you’re tired of clicking.
- For apps: It’s easy. Open the Start Menu, find the icon of the app you want to create a shortcut for (like Spotify, Chrome, or Photoshop), and simply drag it to your desktop. Done.
- For folders or files: Go to File Explorer, find the file or folder you want to make a shortcut for, right-click on it, and select “Create shortcut”. You might need to click on “Show more options” – Windows 11 always requires one extra click. He does feed it, doesn’t he? The shortcut will be created there, and you can drag it to your desktop.
For this walkthrough, I am using Notepad because I always use it to write down random ideas.
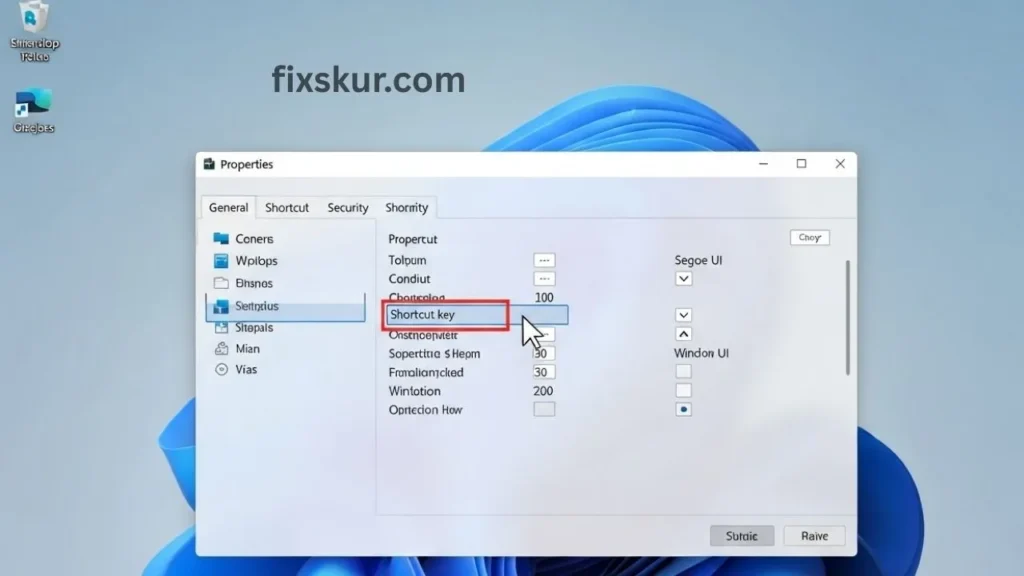
Step 2: Give Your Secret Handshake
Now you have a shortcut on your desktop. Now comes the magic trick part.
- Right-click on your new shortcut and select “Properties”.
- In the window that opens, go to the “Shortcut” tab.
- Look in the “Shortcut key” box, perhaps it says “None” right now. Just click inside it.
- Don’t type now – just press those keys that you want to use for the shortcut. For example, I press Ctrl + Alt + N together for Notepad. Windows will fill it automatically.
- Click on “Apply”, then “OK”.
That’s it! Now press Ctrl + Alt + N (or whatever you’ve chosen), and Notepad will open instantly. It seems like a little thing, but it gives a superior feeling, doesn’t it? Now you can do this for any program or folder.
Pro Tips for Shortcut Success
Some tips that I have learned from experience:
- Keep your desktop clean: There were a lot of shortcuts that quickly piled up on my desktop. I create a folder called “My Shortcuts” and I place all the shortcuts in it. Everything keeps working and the desktop looks clean.
- Create memorable combos: Link letters with programs. For instance, use Ctrl + Alt + W for Word, Ctrl + Alt + P for Photoshop. In the future, you won’t have the stress to remember random combinations.
- Don’t try to break Windows’ rules: You won’t be able to set simple shortcuts like Ctrl + S because it is already used for “Save”. This is actually a good thing – Windows forces you to use Ctrl + Alt + [Key], which rarely conflicts with the built-in shortcuts of programs.
Taking It a Step Further with AutoHotkey
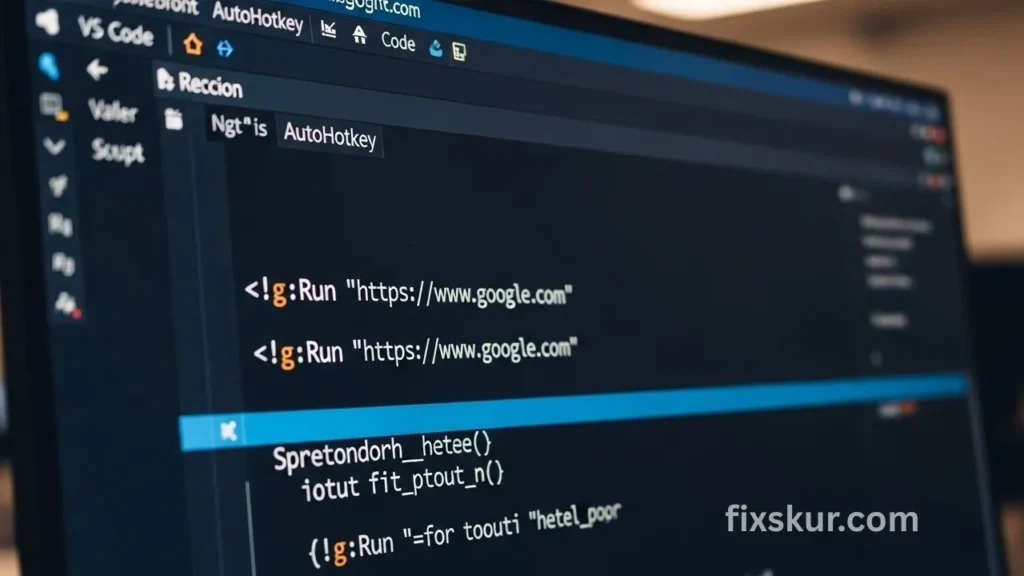
If you’re feeling a bit adventurous and want to create more powerful shortcuts, there’s a fantastic free tool called AutoHotkey. This is essentially a scripting language that gives you the option to make quite advanced automations.
Truth be told, when I first heard the term “scripting language”, I was a bit scared. But believe me, it’s quite simple for creating basic shortcuts. With AutoHotkey, you can:
- Open a specific website with a key combination.
- Auto-insert text that you type repeatedly, like your email address.
- Automate multiple actions in a single command.
Example: Launch a Website with AutoHotkey
For example, let’s say you want to create a simple script to open your favorite website. After installing AutoHotkey, create a script file (which is basically a text file with a .ahk extension) and add this line to it:
^!g::Run “https://www.google.com”
Here, “^” stands for Ctrl, “!” stands for Alt, and “g” stands for the G key. So as soon as you press Ctrl + Alt + G, Google will launch. Pretty cool, right? This is a powerful way to fully customize your Windows 11 in your style.
Final Thoughts on Custom Shortcuts
I know that jumping into new tech tools can feel a bit overwhelming, but I genuinely believe that creating custom keyboard shortcuts in Windows 11 is a top skill for your daily productivity. It’s a small change, but the impact is huge.
Keep the start simple – first try the desktop shortcut method. Choose your 1-2 most-used apps and create shortcuts for them. I guess, once you’ve enjoyed instant access, you’ll get hooked just like me.
So, what will be your first shortcut? Share your ideas – I’m always looking for new ways to streamline my workflow and optimize it.
Our Recommended Post:
- Beyond Copy-Paste: Untapped Windows 11 Clipboard History Tricks
- Stop Chrome from Grouping Tabs – Quick Fix Without Extensions
- Mouse Side Buttons Not Working in Chrome (But Fine Elsewhere)